

Bread rainbow is more than just food it’s art you can eat! This colorful loaf of bread has taken kitchens by storm, bringing fun, creativity, and a pop of vibrant colors to the world of baking. Whether you’re making it for a festive event, Pride Month, or just for fun, bread rainbow is a delightful way to brighten any day.
In this article, we’ll explore everything you need to know to create the perfect bread rainbow. From ingredients and tips for vibrant colors to troubleshooting and creative variations, this guide covers it all. Get ready to bake, layer, and color your way to a stunning loaf that tastes as good as it looks!
Introduction to Bread Rainbow
What Is Bread Rainbow?
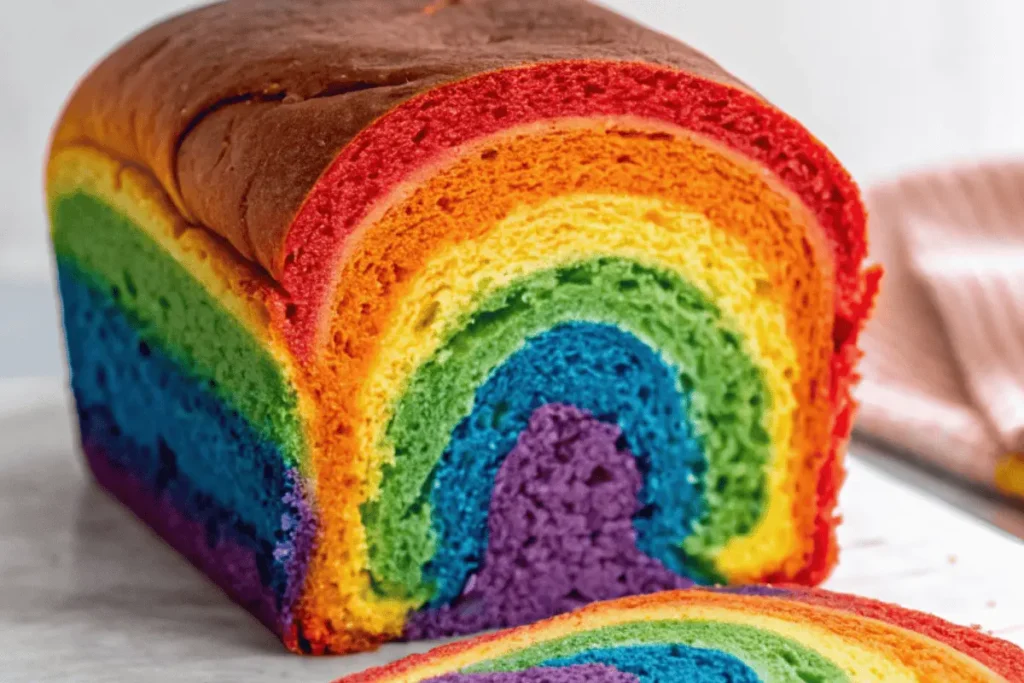
At its core, bread rainbow is a soft, fluffy bread made using a basic white bread recipe with added food coloring for bold, vibrant layers. The dough is divided, dyed in different colors, and then layered or swirled together before baking. The result? A stunning tie-dye loaf that’s as beautiful as it is delicious.
This bread isn’t just eye-catching; it’s also versatile. You can use it for sandwiches, French toast, or as a show-stopping centerpiece at brunches and parties.
Why Is Bread Rainbow So Popular?
The popularity of bread rainbow stems from its whimsical charm and endless possibilities. It’s a hit among kids who love its bright colors and among adults who enjoy its playful nod to nostalgia. Plus, it’s perfect for celebrations whether you’re honoring Pride Month or just adding a splash of color to your table.
The Cultural and Festive Appeal of Rainbow Bread
Rainbow bread isn’t just about aesthetics. It’s often associated with celebration, diversity, and inclusion. Many people bake it during Pride Month as a way to show support for the LGBTQ+ community, while others use it as a creative outlet to add some joy to their baking.
In the next section, we’ll dive into the ingredients and supplies you’ll need to bring your bread rainbow to life. Stay tuned!
Ingredients and Supplies for Bread Rainbow
Essential Ingredients: Flour, Yeast, Food Coloring, and More
Creating a stunning bread rainbow starts with the basics of bread-making. You’ll need all-purpose flour, active dry yeast, sugar or honey for sweetness, and warm water to activate the yeast. These form the foundation of a fluffy, soft loaf. Butter or oil adds richness, while a pinch of salt enhances the overall flavor.
The magic, of course, lies in the food coloring. For the brightest hues, opt for gel food coloring. It blends effortlessly into the dough, ensuring each layer of the rainbow is bold and vibrant. Standard liquid food dyes can work but may result in less intense colors.
Choosing the Right Food Coloring for Vibrant Colors
When it comes to choosing food coloring, not all options are created equal. Gel-based colors are the top choice because they’re concentrated and don’t water down your dough. You can find high-quality gel food coloring at baking supply stores or online. For a natural touch, consider using powders made from beetroot, turmeric, or spirulina to create red, yellow, and green hues.
Kitchen Tools You’ll Need
To create your bread rainbow, gather these tools:
- A stand mixer with a dough hook (optional but saves time).
- A set of mixing bowls, preferably one for each color.
- A rolling pin for layering the dough.
- A standard loaf pan to bake your masterpiece.
Step-by-Step Guide to Making Bread Rainbow
Preparing the Dough: The Base for Your Colors
Begin by activating the yeast in warm water mixed with sugar or honey. Let it sit until frothy this ensures your bread rises properly. Combine the yeast mixture with flour, salt, and melted butter, kneading until smooth. For ease, use a stand mixer, or knead by hand for 8-10 minutes. Once the dough is smooth and elastic, divide it into portions one for each color of your rainbow.
Adding the Colors: Tips for Even Distribution
Wearing gloves, knead gel food coloring into each portion of dough until the color is evenly distributed. This step can be a bit messy but is essential for vibrant results. Allow each colored dough to rest in a lightly greased bowl, covered, until doubled in size.
Layering and Stacking the Rainbow Colors
Once the dough has risen, roll out each color into a flat rectangle about the length of your loaf pan. Layer the colors on top of each other in rainbow order, pressing gently to stick them together. Roll the stacked dough tightly, starting from one end, and place it seam-side down in a greased loaf pan. Cover and let it rise again until it doubles in size.
Baking and Final Touches
Preheat your oven to 375°F (190°C) and bake the loaf for 30-40 minutes, or until golden brown. For an extra sheen, brush the top with melted butter as soon as it’s out of the oven. Let the bread cool completely before slicing to reveal your bread rainbow masterpiece!
For more baking inspiration, explore related recipes like Smoked Mac and Cheese for savory pairings with your rainbow bread.
Next, we’ll uncover tips for perfecting your rainbow loaf every time!
Avoiding Common Mistakes
Creating the perfect bread rainbow can seem daunting, but a few key tips will make it a breeze. First, don’t rush the proofing process. Allowing the dough to rise fully ensures a soft, airy texture. If your kitchen is cool, consider proofing the dough in a slightly warm oven.
Next, when adding food coloring, knead it thoroughly to prevent streaks. This step ensures each layer of your rainbow looks smooth and vibrant. Finally, avoid over-baking! Check the bread for doneness by tapping the top if it sounds hollow, it’s ready to come out of the oven.
How to Keep the Colors Vibrant
The vibrancy of your bread rainbow depends on your coloring technique. Stick with gel food coloring, as it’s more concentrated than liquid alternatives. If you’re using natural dyes, make the colors richer by reducing the liquid or blending with a small amount of flour before adding them to the dough.
Baking at a moderate temperature (around 375°F) helps preserve the colors without browning them too much. You can even tent the bread with foil midway through baking to protect the surface while the inside finishes cooking.
Troubleshooting Dough Consistency
If your dough feels too dry while kneading, add water a teaspoon at a time until it’s pliable. If it’s too sticky, sprinkle a small amount of flour until the texture feels right. Remember, the dough should feel smooth but not overly firm, making it easier to roll and layer.
Creative Variations and Uses for Bread Rainbow
Making Gluten-Free or Vegan Rainbow Bread
For gluten-free bakers, substitute all-purpose flour with a 1:1 gluten-free flour blend. Since gluten-free dough can be sticky, consider adding xanthan gum for better structure. For a vegan twist, replace butter with coconut oil or vegan margarine, and use maple syrup or agave in place of honey.
Using Bread Rainbow for Special Occasions
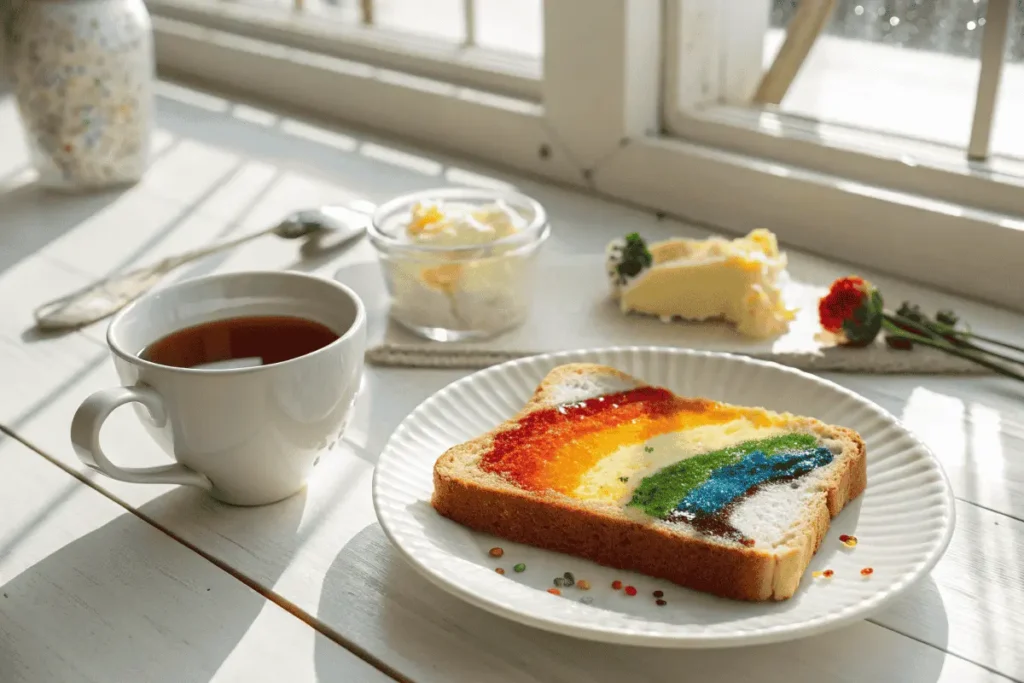
Bread rainbow is perfect for adding a festive touch to holidays, birthdays, or Pride Month celebrations. You can shape it into rolls, braids, or even twist it for a marble effect. Serve it as sandwich bread at a party or use it to create colorful French toast that will impress your guests.
Sweet vs. Savory Versions
Take your bread in a new direction by tweaking the recipe. For a sweet version, add a touch of sugar and vanilla extract to the dough. Use the bread to create desserts like rainbow bread pudding. For a savory spin, incorporate herbs like rosemary or oregano and pair it with dips or soups.
For more unique recipe ideas, check out related recipes like French Toast Bagels, which can complement your colorful creations!
In the next sections, we’ll explore common questions about bread rainbow and share the nutritional breakdown to guide your baking journey.
FAQs About Bread Rainbow
Can I Use Natural Food Coloring for Bread Rainbow?
Absolutely! Natural food coloring is a great alternative for those looking to avoid artificial dyes. Ingredients like beetroot powder, turmeric, spirulina, and matcha can create vibrant colors for your bread rainbow. Keep in mind, though, that natural dyes may produce slightly softer hues.
To enhance their vibrancy, mix the powders with a small amount of warm water or oil before incorporating them into the dough. Experimenting with different combinations can lead to unique and beautiful results.
What’s the Best Way to Store Rainbow Bread?
To keep your bread rainbow fresh, store it in an airtight container at room temperature for up to three days. For longer storage, slice the loaf and freeze the pieces individually. When ready to enjoy, simply toast or warm them for a fresh-from-the-oven taste.
How Long Does Bread Rainbow Stay Fresh?
Like most homemade bread, rainbow bread is best enjoyed within the first couple of days. After that, it may begin to lose its softness. Storing it properly and reheating slices can extend its shelf life, but freezing is the best option if you want to save it for later.
Can I Freeze Bread Rainbow Dough?
Yes, you can! After shaping the rainbow-colored dough, wrap it tightly in plastic wrap and place it in a freezer-safe bag. To bake, allow the dough to thaw and rise at room temperature before putting it in the oven. Freezing does not affect the colors, so your loaf will still bake into a vibrant masterpiece.
Nutritional Information and Considerations
Is Bread Rainbow Healthy?
Bread rainbow is a treat that balances fun and flavor, but its nutritional content depends on the ingredients. Traditional recipes with white flour, butter, and sugar provide energy but may lack fiber and protein. However, using whole-grain or gluten-free flours and natural food dyes can make it a healthier choice.
Nutritional Breakdown Per Slice (Approximate Values)
Here’s a quick look at the nutritional content of a standard slice of rainbow bread (about 50g):
| Nutrient | Amount per Slice |
|---|---|
| Calories | 120 kcal |
| Carbohydrates | 24 g |
| Protein | 3 g |
| Fat | 2 g |
| Sodium | 180 mg |
| Sugar | 3 g |
Next, we’ll wrap things up with some final thoughts on making and enjoying bread rainbow!
Conclusion and Final Thoughts
Why You Should Try Making Bread Rainbow at Home
Creating a bread rainbow isn’t just about baking; it’s about bringing joy and creativity into your kitchen. This colorful loaf turns a simple bread recipe into a work of art that’s as fun to make as it is to eat. Whether you’re baking for a special occasion or simply looking for a unique way to brighten your day, bread rainbow is a delightful project that’s worth the effort.
Beyond its visual appeal, this bread is versatile, allowing you to experiment with flavors, ingredients, and designs. From savory twists to sweet variations, the possibilities are endless. Plus, the sense of accomplishment you’ll feel when you slice into your vibrant masterpiece is unbeatable!
Encouragement to Experiment and Have Fun
Don’t be afraid to put your own spin on the recipe. Try using natural dyes for a healthier option or explore new shapes like rolls or braids. You can even turn your rainbow bread into themed creations for holidays or events. Remember, the kitchen is your canvas, and bread rainbow is your palette. So, roll up your sleeves, embrace the mess, and enjoy the process—it’s all part of the fun!
FAQs and Additional Tips
What Makes Bread Rainbow a Crowd-Pleaser?
The charm of bread rainbow lies in its ability to appeal to all ages. Kids love the bold colors, while adults appreciate its nostalgic and festive vibe. It’s a surefire way to add excitement to any gathering or meal.
How Can I Involve Kids in Making Bread Rainbow?
Baking bread rainbow is an excellent activity for kids. Let them help knead the dough, add food coloring, or layer the rainbow. It’s a fun, hands-on way to teach them about baking while encouraging creativity. Just be prepared for a little extra cleanup!
For more unique recipes, consider exploring French Toast Bagels, which pair wonderfully with rainbow bread for a vibrant breakfast spread.
With all these tips, tricks, and ideas, you’re now equipped to create your very own bread rainbow. Happy baking!