
Have you ever stared at a tub of cottage cheese and thought, “Could this become… chips?” It sounds a little wild, right? But what if I told you that creamy, lumpy cottage cheese could transform into the crispiest, crunchiest, most surprisingly delicious snack you’ve had all week? Get ready, because this cottage cheese chips recipe is about to blow your mind in the best way possible!
This isn’t just another snack recipe; it’s a bit of kitchen magic. We’re taking one simple ingredient and turning it into something totally different and incredibly satisfying. If you love crunchy snacks but want something a little healthier, packed with protein, and super easy to make, you’ve come to the right place. Let’s dive into how to make these amazing chips in just 3 simple steps!
Overview: Your New Favorite Healthy Crunch!
So, what’s the big deal about this cottage cheese chips recipe? Well, for starters, it’s gone viral for a reason! People are amazed that humble cottage cheese can bake up into something so chip-like.
- What Makes It Special: These chips are naturally high in protein and low in carbs, making them a fantastic choice if you’re watching your macros, following a keto lifestyle, or just want a guilt-free crunchy snack. Plus, they use minimal ingredients!
- Time Commitment: You’ll need about 5 minutes to prep and around 20-30 minutes to bake. So, in roughly half an hour, you can go from cottage cheese tub to crispy chip heaven!
- Difficulty Level: Easy peasy! Seriously, if you can spread something on a baking sheet, you can make these chips. It’s a perfect recipe for beginners or when you need a quick snack fix.
This cottage cheese chips recipe delivers big on crunch and flavor without needing a long list of ingredients or complicated steps.
Essential Ingredients: The Simple Stars of the Show
You won’t believe how short this list is!
- Cottage Cheese (The Hero): About 1 cup (or a standard small tub).
- Why it’s important: This is literally the base of your chip! The protein and fats in the cottage cheese are what crisp up in the oven.
- Best type: Full-fat cottage cheese (usually 4%) tends to give the best flavor and texture. Small curd or large curd works, though blending gives the smoothest result regardless of curd size.
- Substitution: You can use low-fat cottage cheese, but the chips might be slightly less rich and potentially a bit more delicate or prone to burning. The fat helps with browning and crisping.
- Optional Seasonings (The Flavor Boosters): This is where you get creative!
- Why they’re important: Cottage cheese on its own is mild. Seasonings turn these into savory, irresistible chips!
- Ideas:
- Everything Bagel Seasoning (A crowd favorite!)
- Garlic Powder & Onion Powder (Classic combo)
- Paprika (Smoked or sweet for color and flavor)
- Italian Seasoning or Dried Oregano/Basil
- Nutritional Yeast (For a cheesy, savory kick – great dairy-free cheesy flavor!)
- Salt & Black Pepper (Adjust based on your cottage cheese’s saltiness and seasoning blend)
- A pinch of Cayenne Pepper (If you like a little heat!)
- How much: Start with 1-2 teaspoons of your chosen blend and adjust to taste. Remember, the flavor concentrates as it bakes.
That’s basically it! The core of this cottage cheese chips recipe is truly just the cottage cheese itself.
Step-by-Step Instructions: The Famous 3 Easy Steps!
Get ready for the magic. Here’s how this cottage cheese chips recipe comes together:
You’ll Need:
- A blender (optional, but recommended for smooth chips) or a bowl and fork/whisk
- A large baking sheet
- Parchment paper (Absolutely essential! Do not skip this!)
- A spoon or offset spatula
Step 1: Prepare the Cottage Cheese Mixture
- Blend (Optional): For the smoothest, most uniform chips, scoop your cottage cheese into a blender. Blend for about 15-30 seconds until it’s smooth and creamy, like thick yogurt. This helps ensure even baking and a consistent texture.
- Or Mix: If you don’t have a blender or prefer a slightly more rustic texture, put the cottage cheese in a bowl. Use a fork or whisk to break up the curds as much as possible. It won’t be perfectly smooth, but it still works!
- Season It Up: Whether you blended or mixed, now’s the time to add your seasonings! Stir them right into the cottage cheese until everything is well combined. Taste it (if you’re comfortable doing so) and adjust seasonings if needed.
(Tip: Some cottage cheese has more liquid (whey) than others. If yours seems very watery, you can try straining it slightly through a fine-mesh sieve or cheesecloth first, but blending usually incorporates the liquid just fine.)
Step 2: Form the Chips
- Prep Your Pan: Preheat your oven to 375°F (190°C). Line your baking sheet completely with parchment paper. Seriously, this prevents sticking and makes cleanup a breeze. Don’t use foil or grease the pan – parchment is key!
- Spoon and Spread: Drop small spoonfuls (about 1 tablespoon each) of the seasoned cottage cheese mixture onto the parchment paper. Leave some space between each dollop (about 1-2 inches).
- Get Thin!: This is the most important part for crispy chips. Use the back of the spoon or an offset spatula to spread each dollop into a thin, even circle (around 2-3 inches wide). Aim for cracker-thin! The thinner you spread it, the crispier your chip will be. If they are too thick in the middle, they might stay chewy.
(Alternative Method: Some people spread the entire batch of cottage cheese thinly across the whole parchment-lined sheet, like a giant cracker. Bake it, then break it into pieces once cooled. This can be easier than forming individual chips, but gives you less control over chip size and shape.)
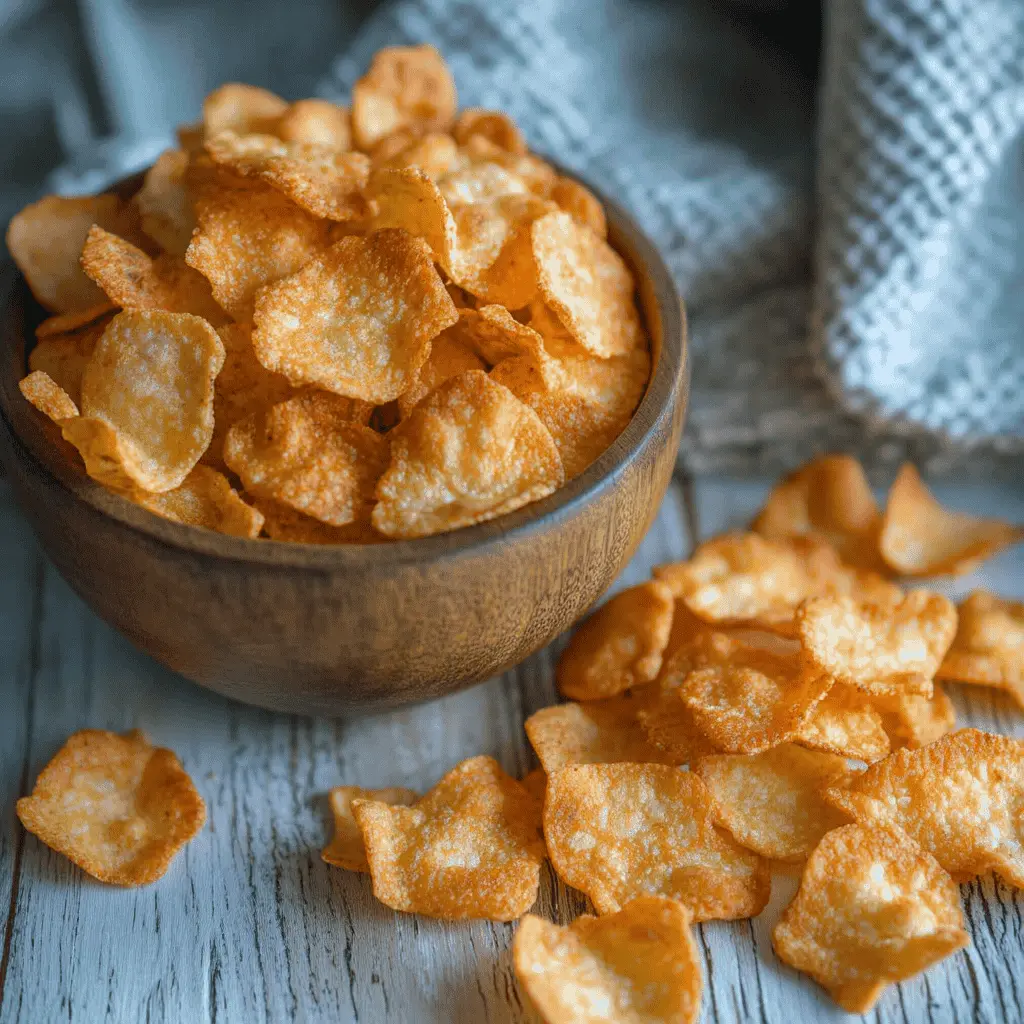
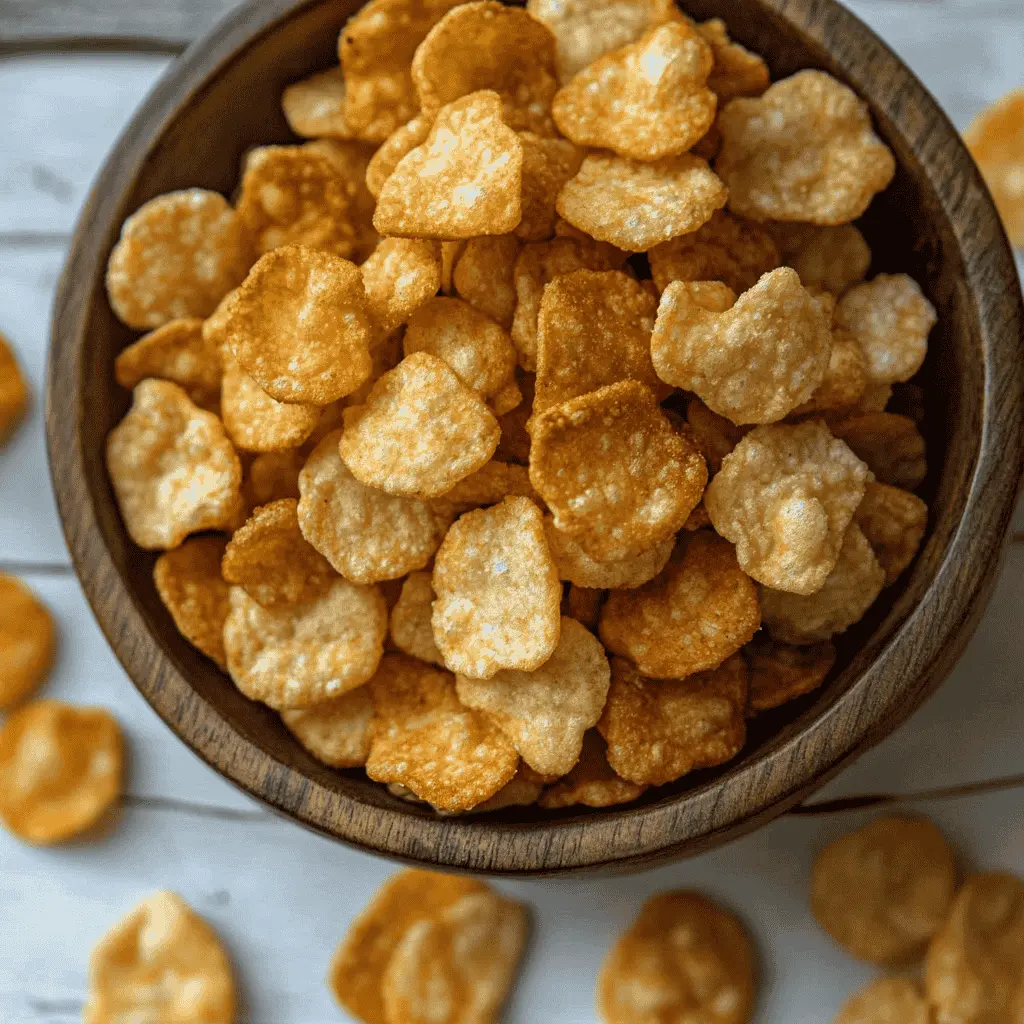
Step 3: Bake to Crispy Perfection
- Into the Oven: Carefully place the baking sheet into the preheated oven.
- Bake Time: Bake for approximately 20-30 minutes. Baking time can vary quite a bit depending on your oven, the thickness of your chips, and the moisture content of your cottage cheese.
- Watch Closely: Start checking around the 15-20 minute mark. You’re looking for the edges to be golden brown and crispy, and the center to look dry and set. They can go from perfect to burnt quickly, so keep an eye on them!
- Cool Completely: Once they look done (golden brown, crispy edges), remove the baking sheet from the oven. Let the chips cool completely on the parchment paper on the baking sheet, or carefully slide the parchment onto a wire rack to cool. This cooling step is crucial – they crisp up significantly as they cool down! Don’t try to eat them hot; they won’t be fully crispy yet.
(Tip: If the centers seem a bit soft but the edges are browning too fast, you can try turning the oven off and leaving the door slightly ajar for 5-10 minutes to help them dry out without burning.)
Assembly: Serving Your Delicious Chips
Okay, “assembly” might be a strong word here since the chips are ready to go once cooled! This is more about how to enjoy your crunchy creation:
- Straight Up: Enjoy them plain! The flavor of the cheese and seasonings really shines.
- Dip It: These chips are sturdy enough for dipping! Try them with:
- Guacamole
- Salsa
- Ranch dip
- French onion dip
- Hummus
- Whipped feta dip
- Crumble It: Break up larger chips and sprinkle them over salads or soups for a crunchy, high-protein topping (like croutons!).
- Presentation: Arrange them nicely on a plate or in a bowl. Because they look unique, they’re a fun conversation starter!
If you’re interested in exploring other quick meals, take a look at Spinach and Ham Quiche Recipe for more ideas.
Storage and Make-Ahead Tips: Keeping the Crunch
These cottage cheese chips are definitely best enjoyed fresh on the day they are made for maximum crispiness. However, here’s how to store them if needed:
- Storage: Once the chips are completely cool (and I mean 100% cool and dry – any warmth will create steam and make them soggy), store them in an airtight container at room temperature.
- How Long: They are best within 1-2 days. They may lose some of their initial crispness over time as they absorb moisture from the air.
- Recrisping: If your chips get a little soft, you can often revive them! Spread them in a single layer on a baking sheet and pop them back into a 350°F (175°C) oven or an air fryer for just a few minutes (watch carefully!) until they crisp up again. Let them cool before eating.
- Make-Ahead: While you can make them a day ahead, they really shine when fresh. The process is so quick, it’s often worth making them closer to when you plan to serve them.
Recipe Variations: Get Creative!
This simple cottage cheese chips recipe is a fantastic base for experimentation. Try these fun twists:
- Spicy Kick: Add 1/4 – 1/2 teaspoon of cayenne pepper or red pepper flakes to the mixture.
- Extra Cheesy: Mix in 1-2 tablespoons of nutritional yeast for a deeper cheesy flavor, or add a tablespoon of finely grated Parmesan cheese before baking.
- Herb Garden: Add finely chopped fresh herbs like chives, rosemary, or thyme along with your dried seasonings.
- Seeded: Mix in a teaspoon of chia seeds, sesame seeds, or poppy seeds for extra texture and nutrients.
- Ranch Flavored: Use a tablespoon of dry ranch seasoning mix instead of other seasonings.
- Taco Time: Season with taco seasoning for a fiesta flair, perfect for dipping in salsa or guacamole.
Conclusion: Your Turn to Crunch!
Isn’t it amazing what cottage cheese can do? This cottage cheese chips recipe is proof that healthy snacks don’t have to be boring or complicated. In just three easy steps, you get a crunchy, savory, protein-packed treat that satisfies those chip cravings in a whole new way.
Whether you stick to the basic recipe or experiment with different seasonings and variations, the fun is in the making (and the eating!). Don’t be afraid to play with the flavors and find your perfect combination.
So go ahead, grab that tub of cottage cheese, fire up your oven, and get ready to impress yourself (and anyone lucky enough to share with you!). Happy snacking!
FAQs: Your Questions Answered!
- Q1: Are cottage cheese chips actually crispy?
- A: Yes! If you spread them thin enough, bake them until golden brown, and let them cool completely, they get surprisingly crispy and crunchy. Thickness is key!
- Q2: Is this cottage cheese chips recipe healthy?
- A: It’s generally considered a healthier snack option! It’s high in protein, low in carbohydrates, and gluten-free. The exact nutritional profile depends on the type of cottage cheese you use (full-fat vs. low-fat). They are definitely a more nutrient-dense option than traditional potato chips.
- Q3: Can I use low-fat or fat-free cottage cheese?
- A: You can try, but full-fat (like 4%) cottage cheese generally yields the best results in terms of flavor and crispiness. Low-fat versions have more water and less fat, which can affect the texture and make them more prone to burning before crisping.
- Q4: Why didn’t my cottage cheese chips get crispy?
- A: The most common reasons are:
- You didn’t spread them thin enough.
- You didn’t bake them long enough.
- Your oven temperature was too low.
- You didn’t let them cool completely (this step is vital for crisping!).
- Your cottage cheese was unusually watery.
- A: The most common reasons are:
- Q5: How long do these chips last?
- A: They are best eaten the same day for maximum crunch. Stored in an airtight container at room temperature after cooling completely, they might last 1-2 days but may soften slightly.
- Q6: Can I make these in an air fryer?
- A: Yes! You’ll need to line your air fryer basket with parchment paper (use perforated parchment if possible, or cut slits to allow airflow). Air fry at around 350°F (175°C) for likely less time, maybe 10-15 minutes, working in batches. Keep a close eye on them as air fryers cook faster.
- Q7: What are the best dips for cottage cheese chips?
- A: They pair well with almost any dip you’d use for regular chips or crackers! Guacamole, salsa, ranch, onion dip, hummus, or even just plain Greek yogurt seasoned with herbs are great choices.